
Making homemade fresh milled flour pita bread is so easy to do, and requires just a few ingredients. It is soft, delicious, and the perfect vessel for lunch meat, or hummus and garlic dip. With my tips and tricks you can get perfectly puffed pita bread every time you make it. Make your own freshly milled pocket pita bread today, I promise you won’t regret it.
This post contains Amazon affiliate links. As an Amazon Associate I earn from qualifying purchases at no extra cost to you.
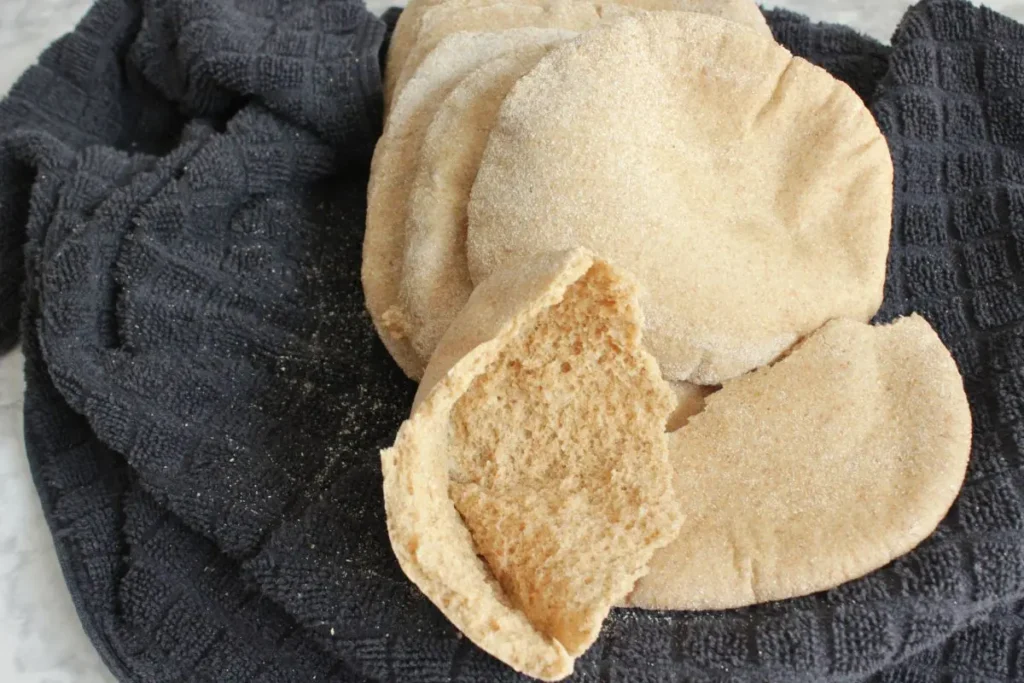
Making pita bread at home isn’t difficult, but does require a few tricks to get that perfectly puffed pita. If you have already made my fresh milled sourdough bread, or my sandwich bread, then pita bread a great way to try more fresh milled flour. I tried many recipes before developing this one. While the others tasted fine, often times only one or two of the pitas would puff up, leaving me with sad pocket-less pitas.
This recipe though. Perfect pockets each time I make them!
Why You’ll Love this Recipe
- Perfect pockets every time you make these pitas
- Made with 100% whole grain for an enhanced flavor
- Soft and chewy
- Great for sandwiches or dipping in hummus
- A foolproof recipe everyone can follow
- Freezer friendly
Tips for Getting Pockets in Fresh Milled Flour Pita Bread
- Autolyse: Be sure to allow your dough to autolyse before shaping your rounds. You need to allow fresh milled flour extra time to absorb the liquid.
- Be gentle: Roll your pita rounds out gently (and not too thin). You don’t want to deflate the air bubbles that were created when the dough rose. The air bubbles plus the moisture in the pitas are what cause the dough to puff in the oven.
- High heat: pita bread needs high heat to properly puff. I use a NerdChef baking steel that has been preheated to 475 degrees F. Then before I am ready to put my dough in the oven I turn on my broiler so that there is top heat. I think this trick has really helped improve the pita puff-ability.
- Proper hydration: You need to make sure you dough is properly hydrated. The steam in the dough helps pita bread get their signature pocket.
Ingredients in Fresh Milled Pocket Pitas
- hard wheat: this recipe uses a mixture of hard red white and hard white wheat. The hard white keeps the pitas light, and the hard red helps with gluten development and flavor
- water: the 70% hydration helps the pocket form in the pita bread
- salt: adds flavor
- yeast: how we make the dough rise. You can use instant or active dry
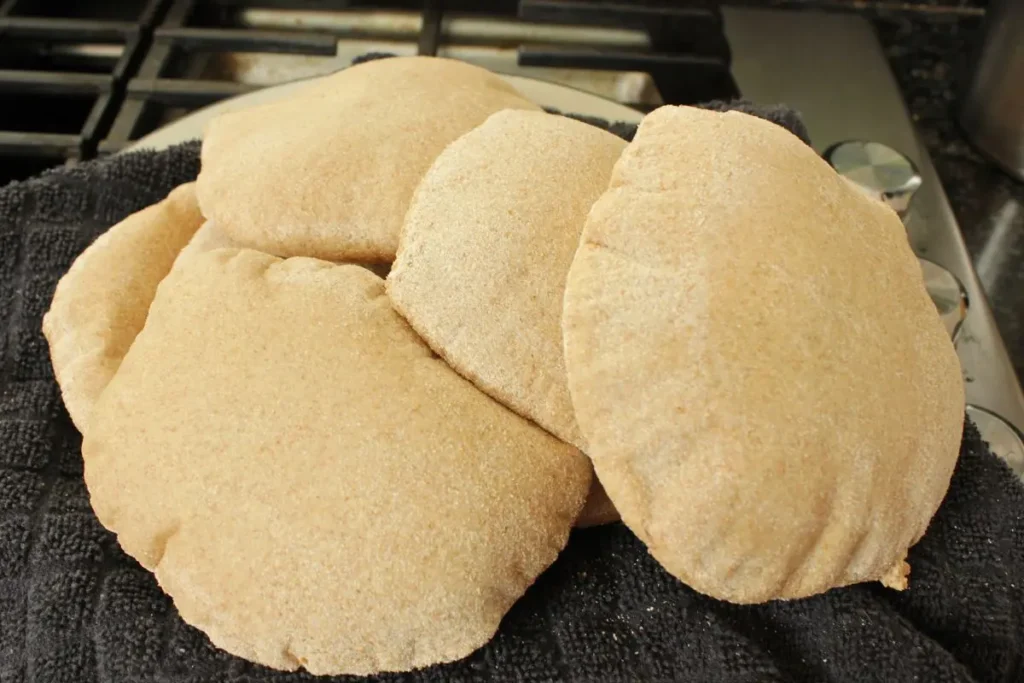
Steps to Make Fresh Milled Pita Bread
While the total time to make this pita bread is between 2-3 hours, the hands on time is only about 20-30 minutes. Most of the time is allowing the dough to autolyse, rise, and rest.
Mill and sift your flour
Mill your flour, then use a 40 mm sifter (these are the sifters I use) to remove some of the bran. You can save it or throw it out.
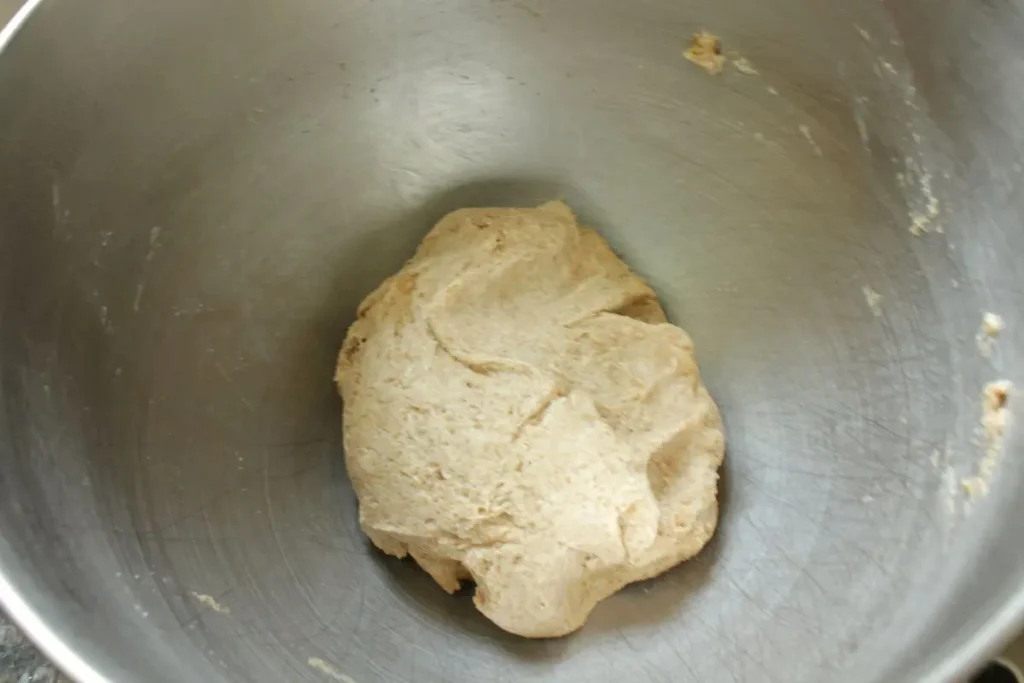
Autolyse dough
Add the water and oil to the flour. Mix until a ball forms. Cover with a damp tea towel and let rest for an hour. This step allows the flour to fully hydrate, which is crucial for getting that pocket.
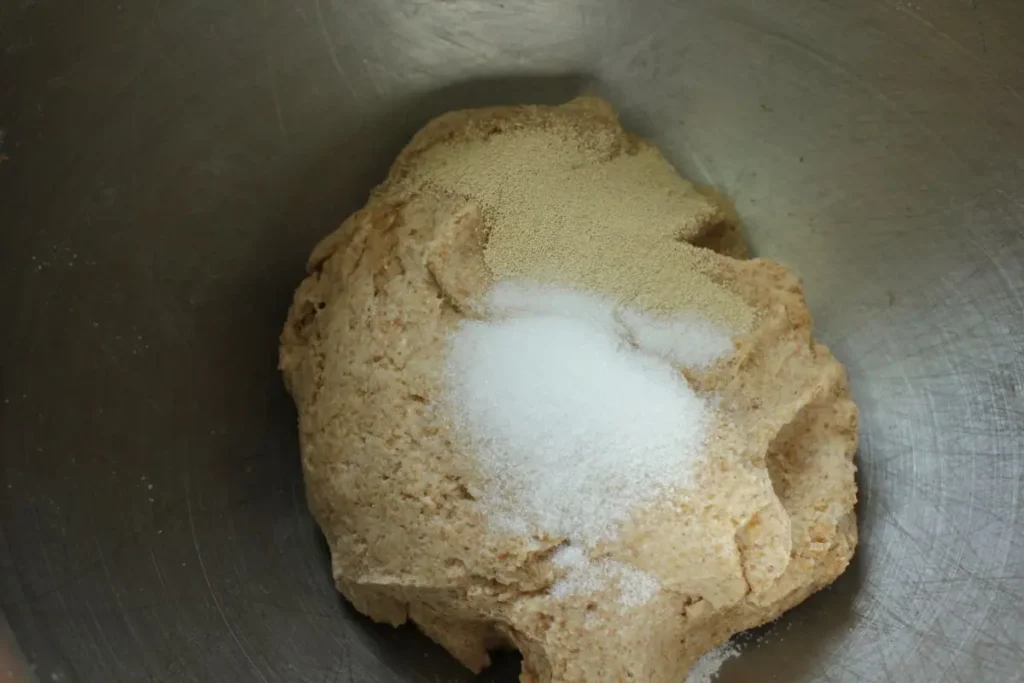
Add yeast and salt
Add the yeast and salt and knead the dough for about 5 minutes. The dough will become smooth and slightly elastic.
Let dough rise
Place the dough in a bowl coated with olive oil, cover with a damp towel, and let rise until double. I love using these cambro containers because they really help me see when the dough has doubled so I don’t risk over proofing.
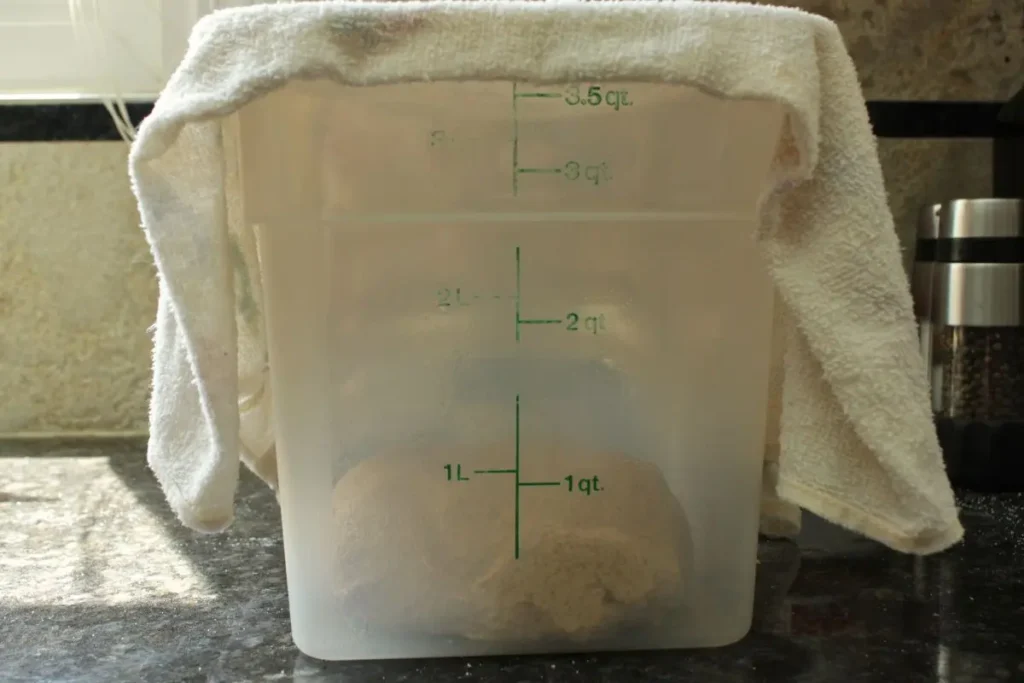
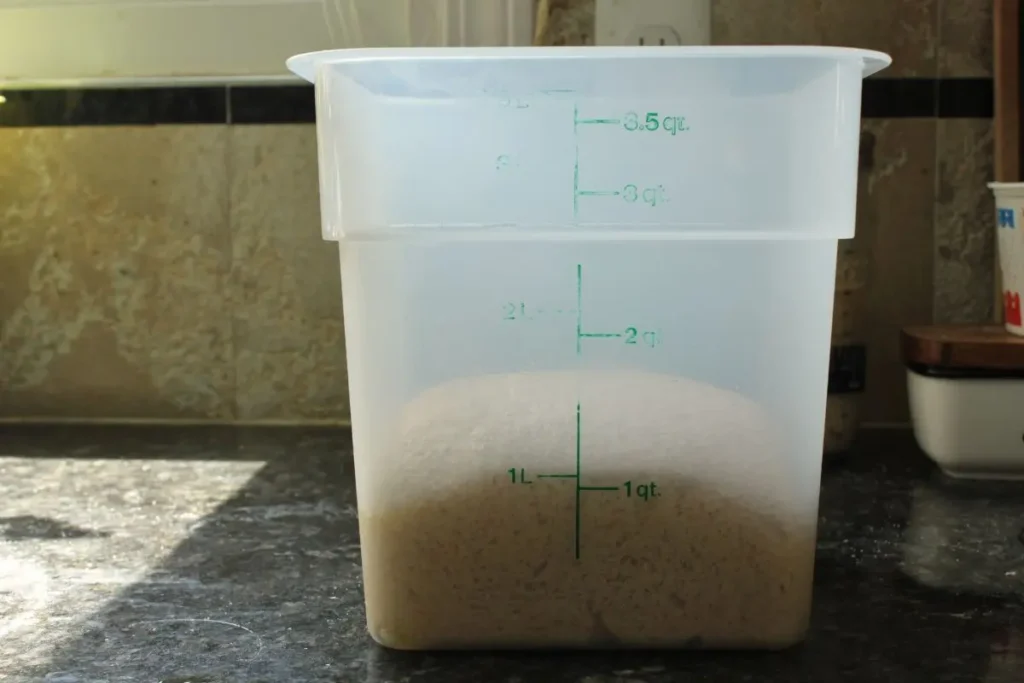
At this point in time, you should also start preheating your oven and pizza stone or steel. You want the oven and steel/stone to be preheated for at least an hour before putting your pita in. If you don’t have a stone or steel you can use an inverted cookie sheet.
Divide dough
Carefully divide dough into 75 gram pieces (for a 6 inch pita), and gently shape into a ball. I try not to push down too hard while doing this, since I don’t want to knock out all the gas.
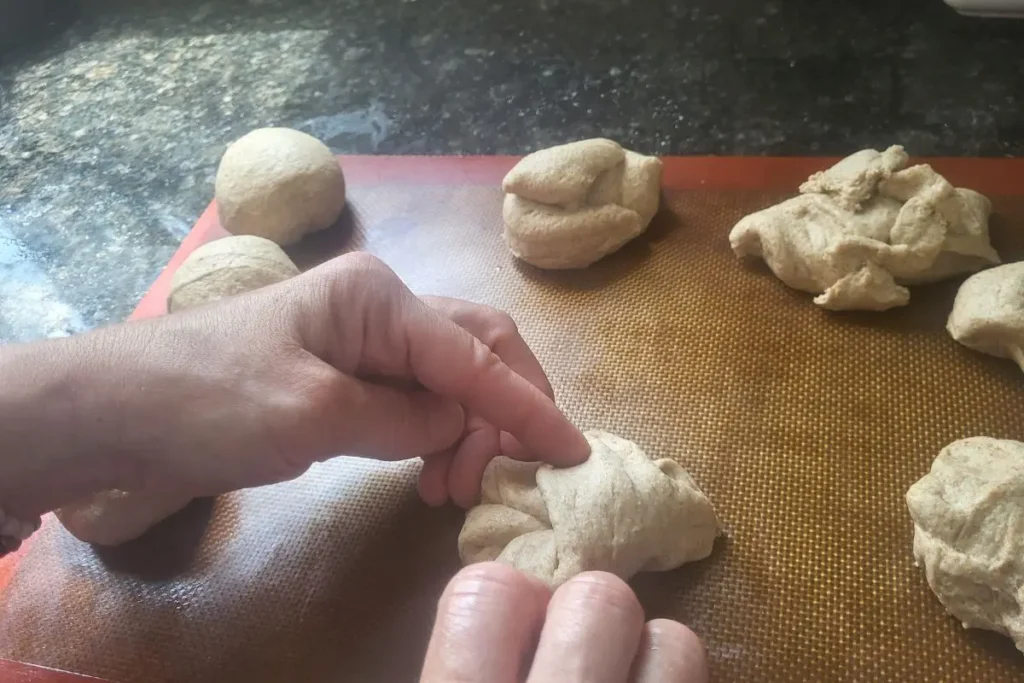
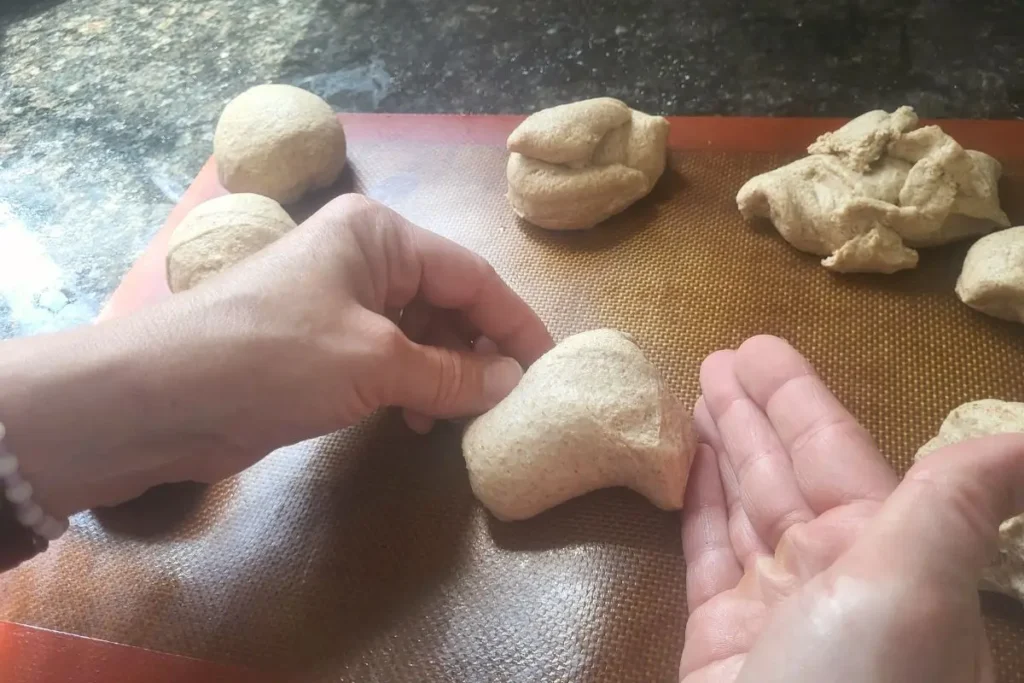
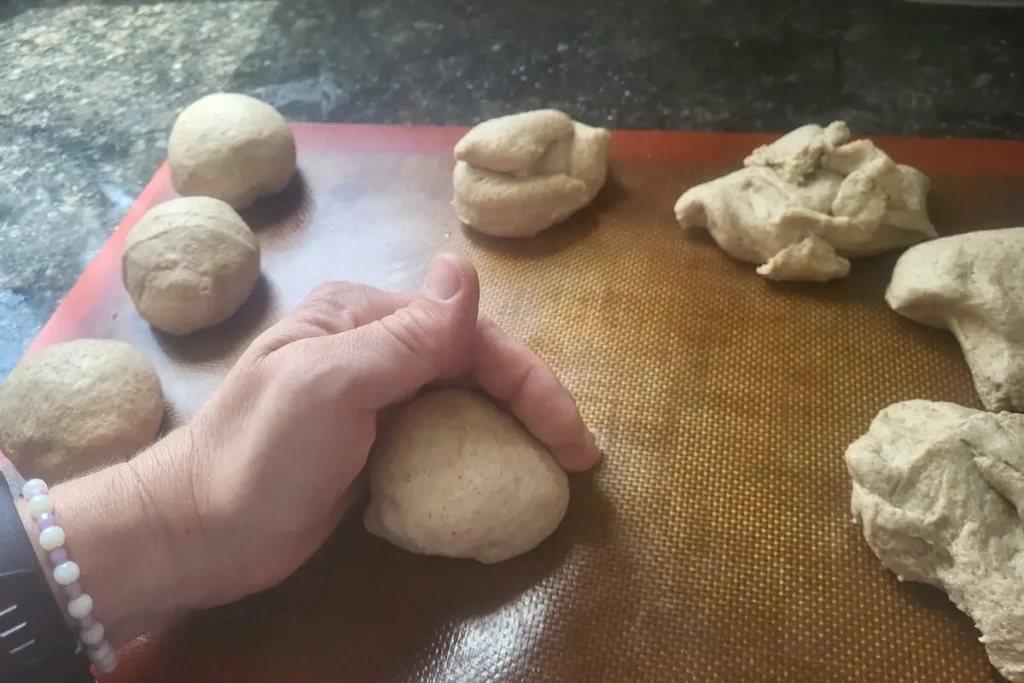
I shape these similarly to how I shape my bagels. It is really hard to take a pictures of the process, so here is a video showing how I form rounds. Obviously you won’t poke a hole in the center for pita bread.
Cover and let rest
After shaping your pitas, cover them with a damp towel and let them rest another 15-30 minutes.
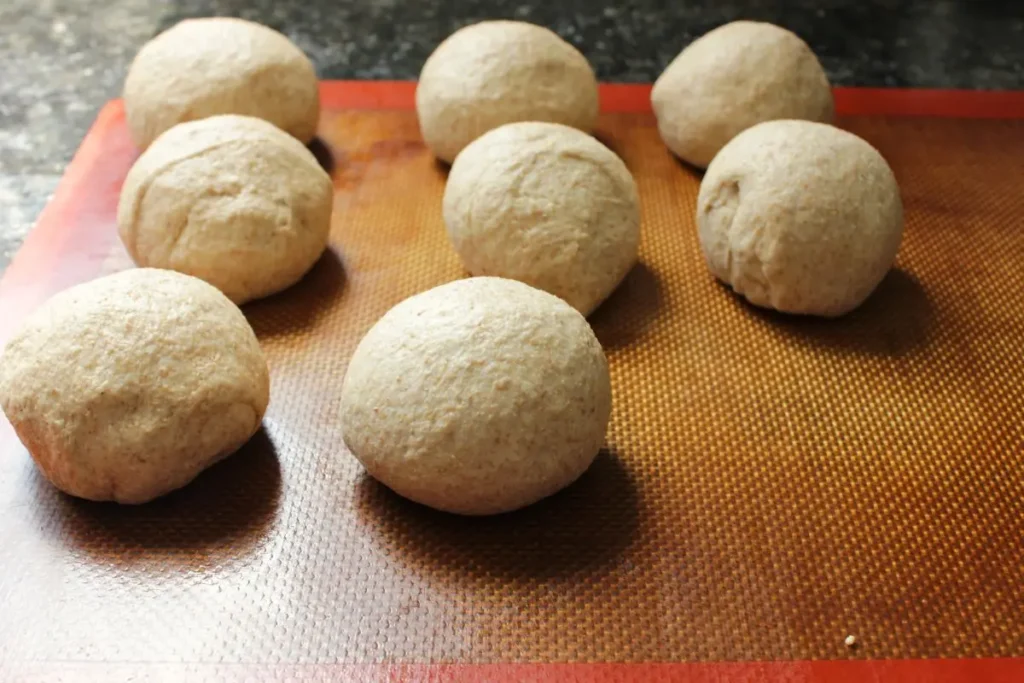
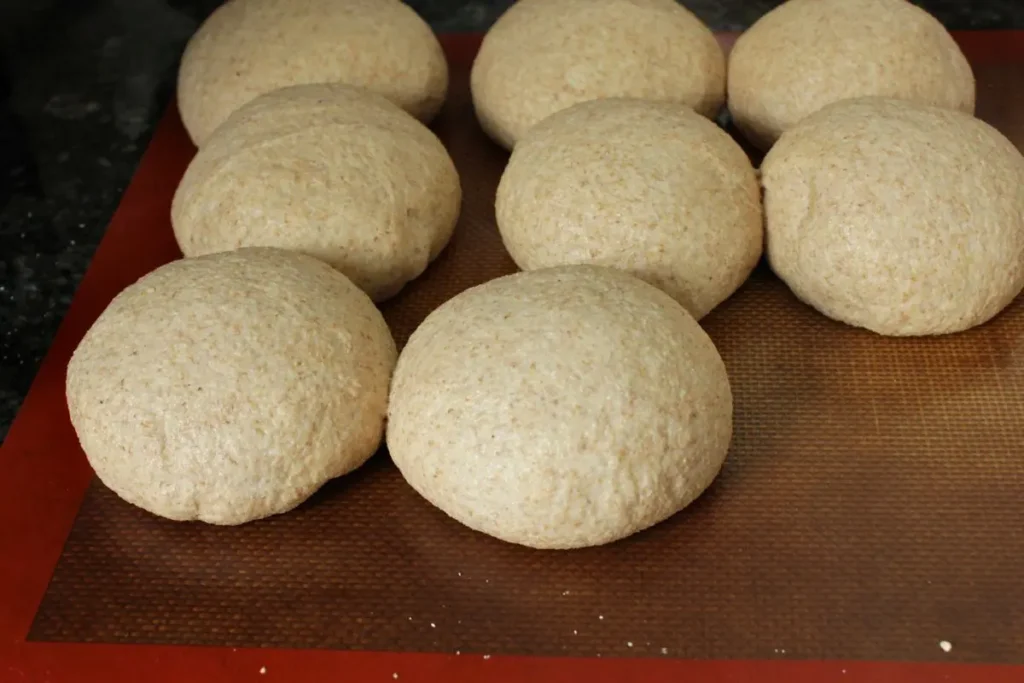
Roll your pitas
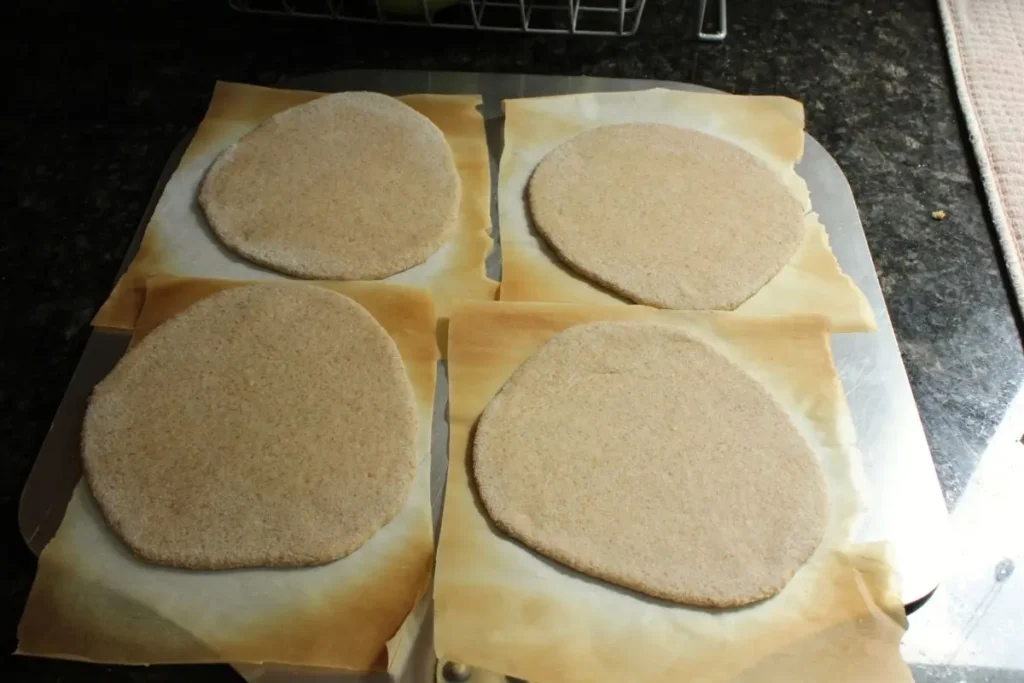
Roll your pitas to about six inches across, and 1/4 inch thick (I use rolling pin rings like these to help keep my dough the right thickness). Once again you don’t want to aggressively roll them out, but gently. If they tear they are less likely to puff because the steam has an escape route.
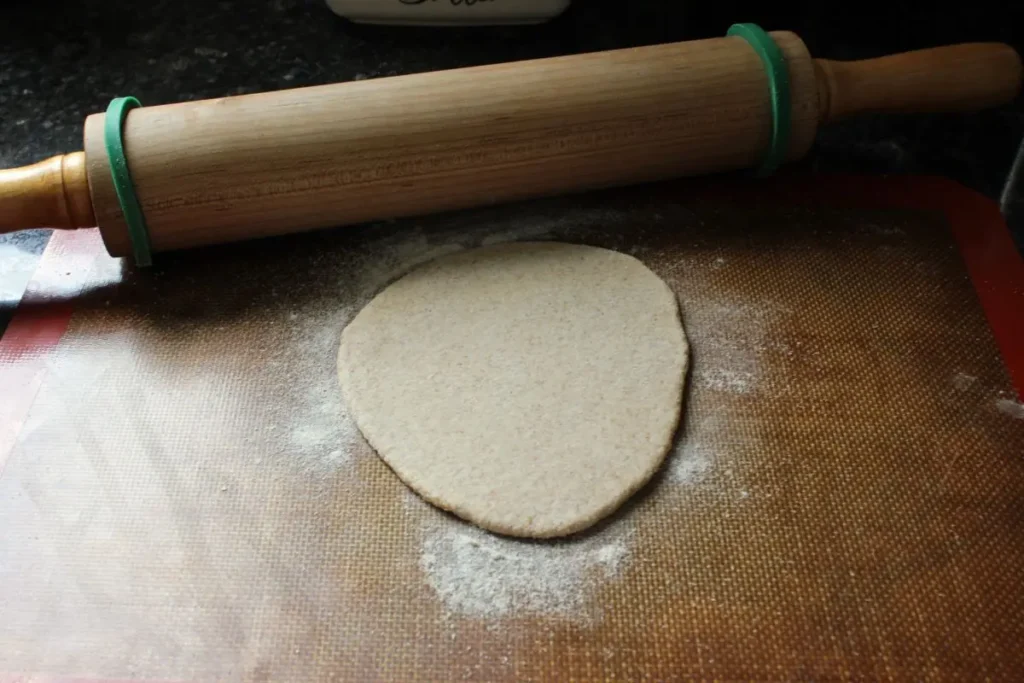
Place each pita on a piece of parchment paper, and put that on a pizza peel. I can fit four pitas on mine at a time. I reuse the parchment squares a few times, hence why they are brown.
Add top heat and bake
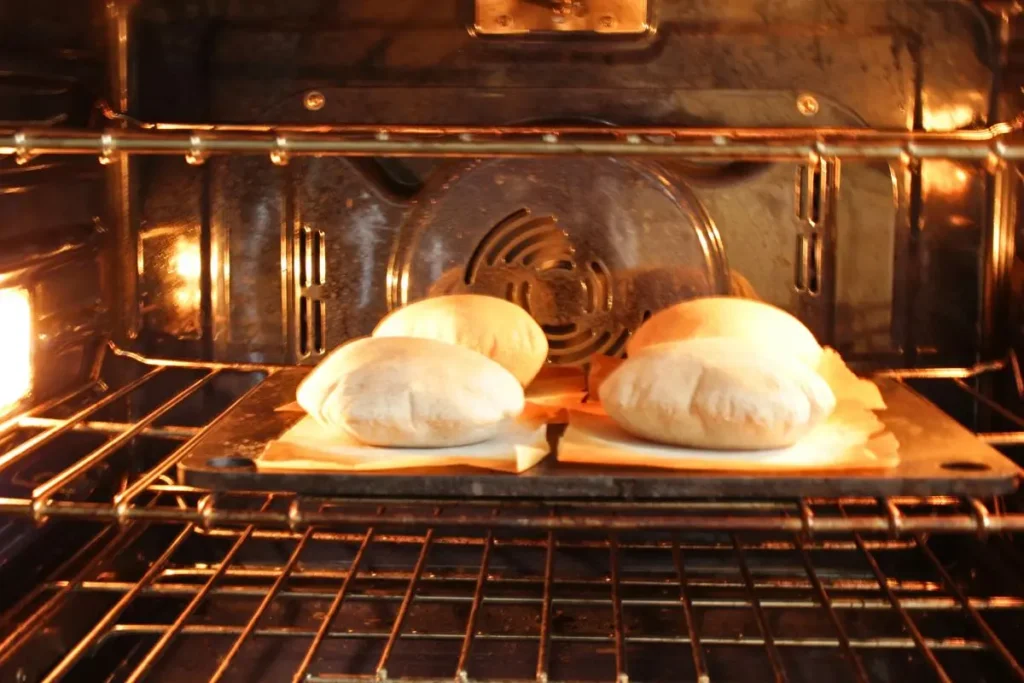
When you are ready to bake, turn your oven’s broiler on. Once you can see that it is getting hot put the pitas in the oven and close the door. In about 1-1.5 minutes you will see the pitas start to balloon up. After they have ballooned up, turn your oven back down to 475, and bake for about a minute more.
Remove from oven
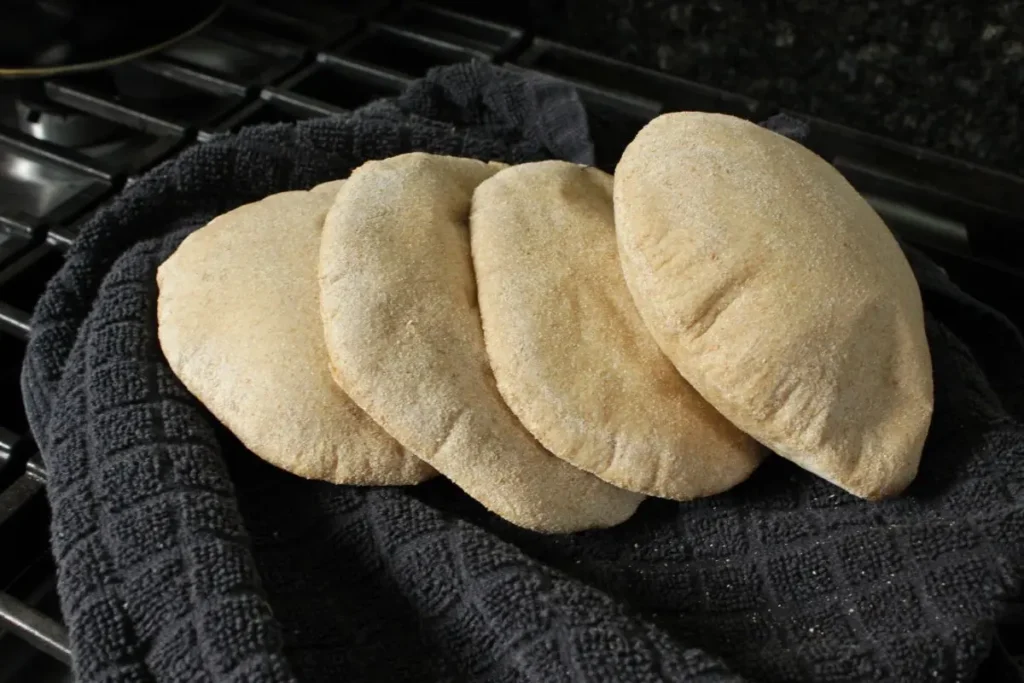
Take the pitas out of the oven (using your pizza peel) and place them on a plate, or in a bowl that has been lined with a towel. Cover the baked pitas with the towel while you repeat the process with the other pitas.
Serve and enjoy!
These pitas taste amazing with hummus or garlic dip, with lunch meat, or just plain.
What to Serve with Fresh Milled Pita Bread?
There are so many different options, some include:
- hummus and toum (aka garlic dip)
- falafel
- kofta
- shawarma
- lunch meat
- DIY breakfast sandwich with eggs and meat
- chicken salad
Ingredients
Equipment
Method
- Mix the flour, water, and oil together and allow to autolyse for one hour.
- Add the salt and yeast. Knead dough for about five minutes until smooth and elastic.
- Place in a bowl coated in olive oil and rise until doubled. While dough is rising preheat your oven and pizza stone (or steel or cookie sheet) to 475℉.
- After dough has risen, gently remove it from the bowl, and divide dough into pieces (about 75 grams a piece for a 6" pita). Gently form each piece into a round ball by lightly dragging and turning it on the counter.
- Cover the dough balls with a damp tea towel and allow to rest for 20-30 minutes.
- Roll the balls into a circle about 6 inches wide and 1/4" thick. After you have rolled the dough into a circle, put it on a piece of parchment paper, and place it on a pizza peel. Repeat the same thing three more times (or however many rounds you can fit on your pizza stone).Be sure to keep the dough balls covered while you are rolling the pitas. For this step I roll one ball at a time until I have four total. I then bake those four pitas before repeating the process.
- After you have rolled the pita turn the broiler in your oven on (mine reaches 550℉). When you can tell the broiler is hot transfer the pita on the peel onto the pizza stone. In about one minute they should start to puff up. After they have puffed up turn the oven back to 475℉ and continue to bake for another minute or two.
- Remove the pitas from the oven and wrap in a dry tea towel.
Baker’s Percentages for Fresh Milled Pitas
Baker’s percentages (also called baker’s math) is a method where every ingredient is a percentage of the total flour weight. In this method flour is always 100%. Using baker’s percentages really helped me when I started with fresh milled flour, since I could compare hydration levels, and easily scale recipes up or down.
|
Ingredient |
Weight |
Baker’s Percentage |
|---|---|---|
|
flour |
350g |
100% |
|
water |
245g |
70% |
|
olive oil |
18g |
5% |
|
salt |
7g |
2% |
|
yeast |
5g |
1.5% |
FAQs about Pita Bread with Fresh Milled Flour
How do I store fresh milled pita bread?
Pita bread can be stored in an airtight bag or container at room temperature for up to three days. Be sure to allow the bread to cool completely before putting it away.
Any longer than 3 days and you are going to want to freeze it. Place a piece of parchment paper or wax paper between each pita (to prevent them from getting stuck together), and stack them. Then put them in an airtight container or bag and place in freezer for up to 3 months.
Why didn’t my pita bread puff?
Pita bread that didn’t puff can be caused by many reasons
- Your dough was not properly hydrated. If it is too dry there will not be enough moisture to cause the steam to puff up the bread.
- You rolled it out too thin or too thick. If the pita is too thin not enough steam can build up to puff, but if it is too thick, then the pita is too dense. With this recipe rolling it to 1/4″ is just the right thickness.
- The pita tore as you rolled it. If there are tears in the pita then the steam can escape and won’t puff up the pita.
- Your oven was too cold. Pita bread needs high heat to properly puff. The high heat causes the moisture in the pita to turn to steam which creates the pocket.
Can I make this recipe with all purpose flour?
You can, but will have to make adjustments. This recipe was created specifically for fresh milled flour which is “thirstier” than all purpose. You will either want to add more flour, or use less water if you plan on using all purpose flour.
Can I make pita bread on the stove?
While I have not tried with this recipe you should be able to. You will need to heat a cast iron pan over high heat. Place the pita bread on the cast iron and cook for about 30 seconds or until it starts to bubble. Then flip the pita over and continue cooking on the other side. It should continue to bubble and puff. Once it is puffed remove and cove with a tea towel.
What’s the difference between pita and naan?
Pita bread is a middle eastern bread that is a simpler dough made with just a few ingredients. It puffs up and has a signature pocket, perfect for holding meats like shawarma, falafel, or kofta.
Naan is a richer Indian bread that often includes yogurt or milk in the dough. It is a dense bread, and therefore does not have a pocket.
Fresh Milled Vs. All Propose Flour Pita
If you are new to using fresh milled flour there is a difference between using fresh milled and all purpose. I for one love the taste of fresh milled flour products. Below you can see a quick comparison between fresh milled and all purpose pitas.
|
Fresh Milled Flour Pitas |
All Purpose Flour Pitas |
|---|---|
|
Needs the autolyse step |
Autolyse usually not needed |
|
Higher hydration |
Lower hydration |
|
Whole wheat flavor |
less flavor |
|
Higher fiber content |
Lower fiber content |
|
Denser |
Less dense |
More Fresh Milled Flour Recipes
If you are looking for more ways to use fresh milled flour, check out these recipes. I’m here to show you that baking and cooking with fresh milled flour is not hard!
