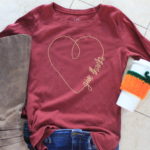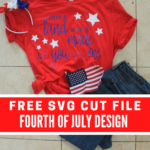
One of my goals the past few months has been to choose joy. Last month I wrote this post after a particularly hard day.Right around that same time I snagged a cheap shirt from Target during one of my $10 Target challenge runs. The shirt was plain, and I figured it would be a great shirt to do a little DIY with. So, I decided to dabble with heat transfer vinyl and make a “choose joy” shirt.
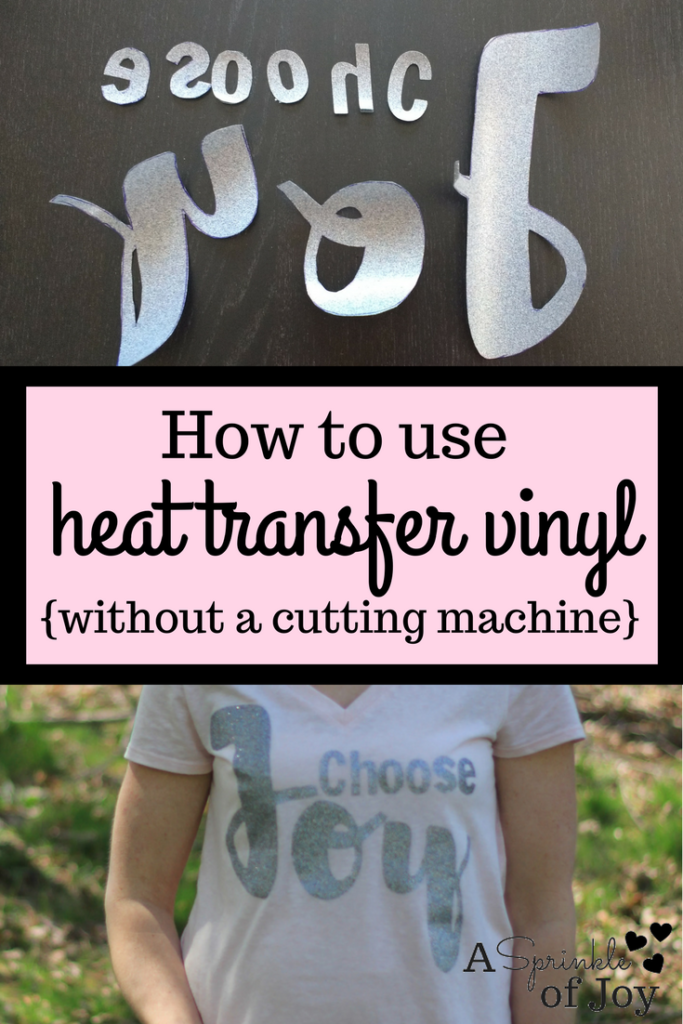
Now, I have seen shirts made with heat transfer vinyl using the Cricut Explore Air 2 or the Silhouette Cameo 3. The shirts turned out so awesome, and I would love to get my hands on one of those machines to play with. But, since I do not have one, I went old school and traced the letters. Here’s how I got it done.
STEP ONE:
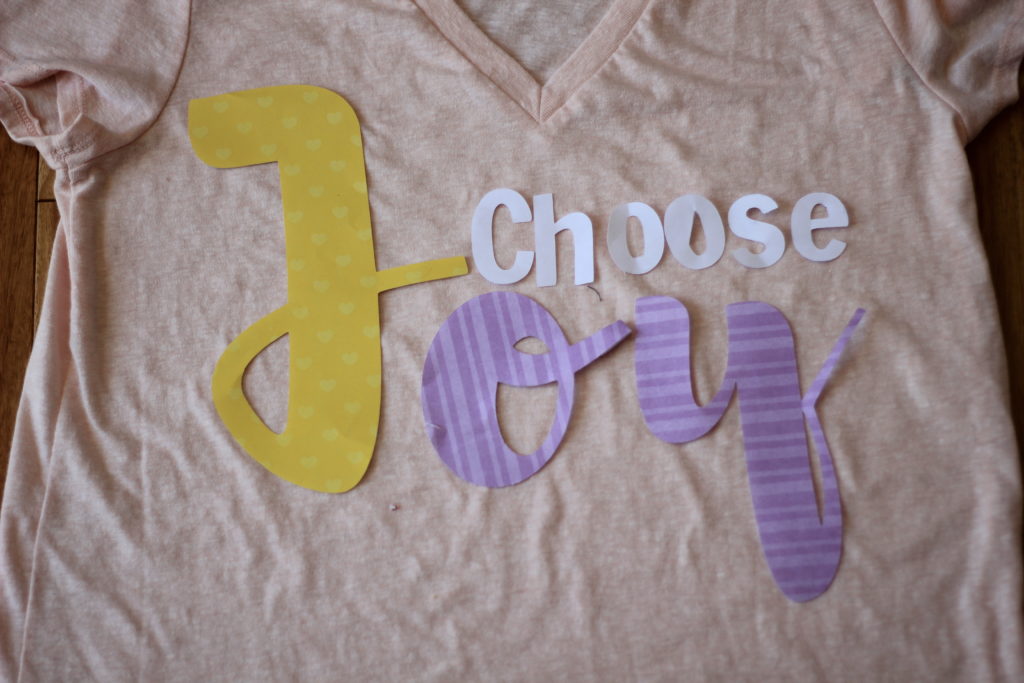
The first thing I did was figure out what font I wanted to use for my letters. I headed to Canva to find what I liked ( I used Brusher for “joy”. I can’t remember what I used for choose though), and then cut my letters out on scrapbook paper to make sure I liked the the size.
STEP TWO:
After that I traced the the letters onto the heat transfer vinyl (HTV). You want to make sure you flip your letter over, and trace it on the mat side of the vinyl.
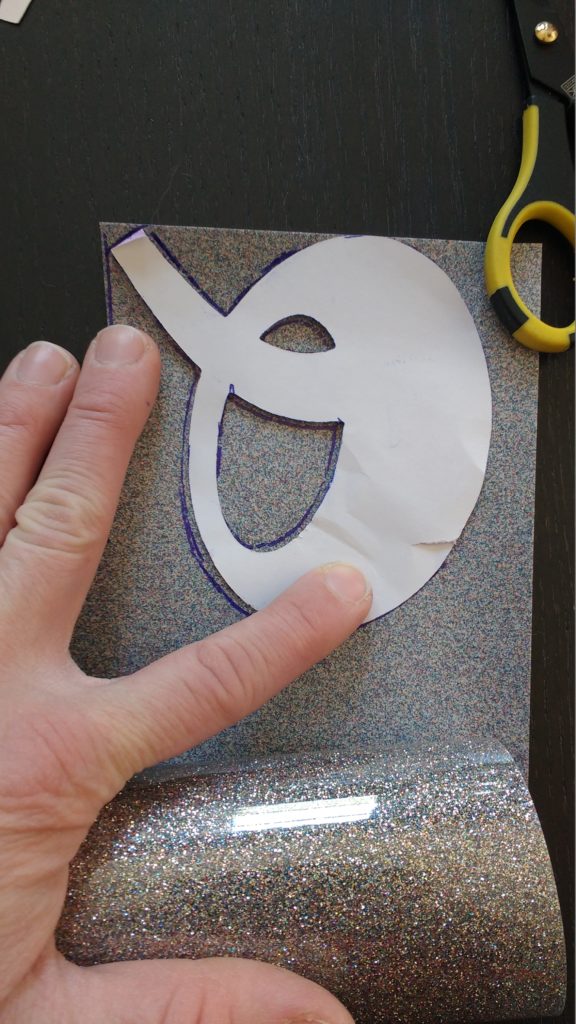
Once I was all done, this was what I had
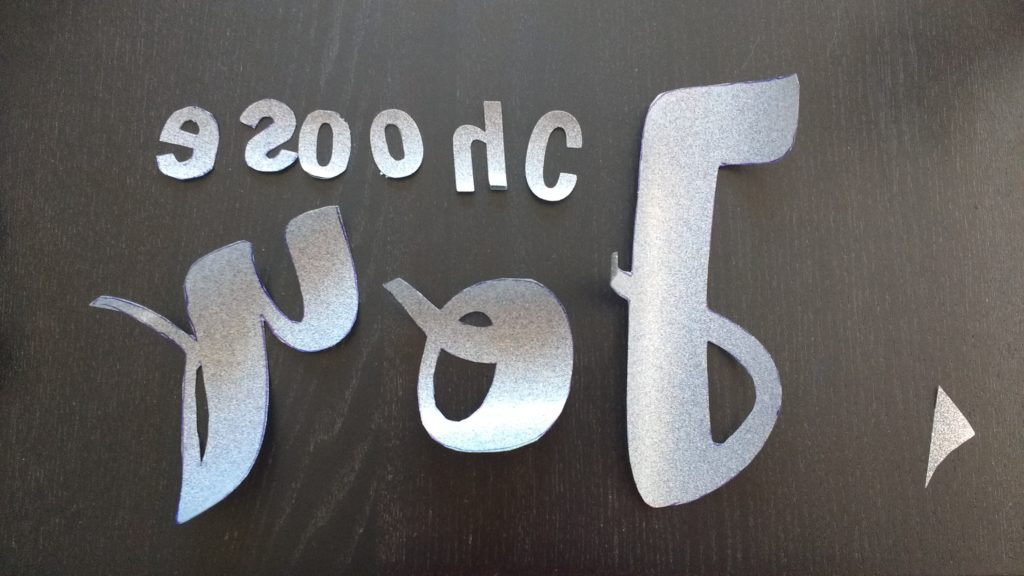
**I’d like to note, if I had one of the cutter mentioned above, it would cut through just the vinyl. You would then pull away all of the non-letter vinyl (called weeding), and be left with a big piece of HTV to be transferred to a shirt, mug, wood, or whatever material you want. Using a Cricut or Silhouette would make the next step much easier.
STEP THREE:
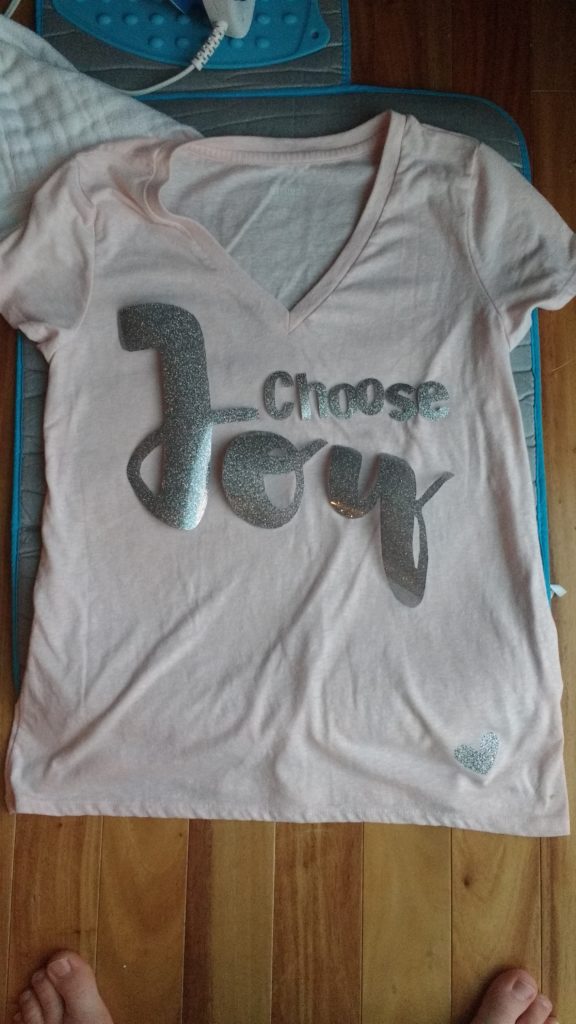
Now that you have all your letters cut out it’s time to place them on your shirt. The mat side is down, and the shiny side is up. Since I had individual letters it took a while for me to place them. If I had a Circut or Silhouette, all the letters would have been on sheet, so I wouldn’t of have to worry about about trying to get them straight.
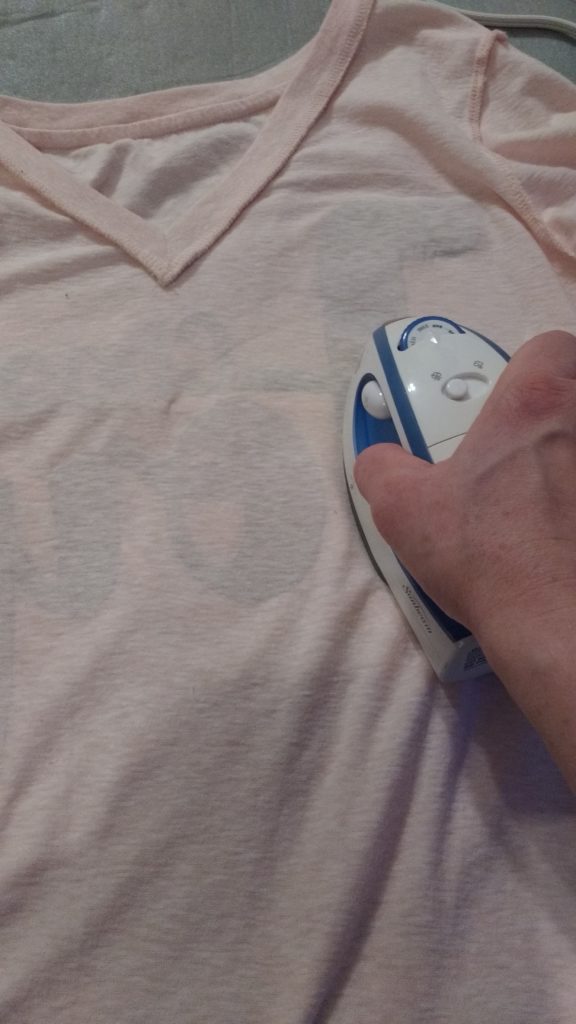
STEP FOUR:
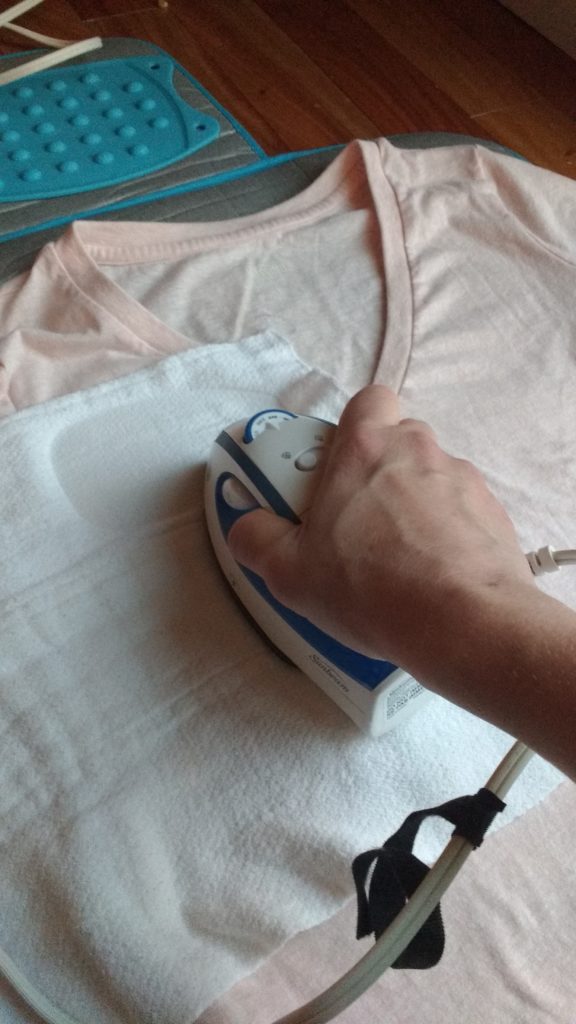
Now that all of your letters are where you want them, it’s time to iron! You will want to put some sort of material between your letters and iron. I used a burp cloth, but think it would have been better to use a thinner piece of cotton.
STEP FIVE:
After you have all of your letters ironed on flip your shirt inside out, and iron the opposite side.
STEP SIX:
Now you are ready to take the lining off! It should be easy to do. You may feel just a little bit of resistance, but your letters should now be on your shirt.

And you are done!! Put that shirt on and admire your work!

So this is my first time taking “fashion” pictures, so please bare with me. 😉


Annabelle was outside with me (Autumn was napping) while I was taking my pictures. I looked over and saw her “posing” as well, and it was so cute, so I had to get a few pictures with her. The following is one of my favorites.

I already have more plans for how to use HTV, so be ready!

Wow Me Wednesday
To Grandma’s House we Go